Configure a WAF
At the start of the deployment process, you will access the Managed WAFinterface for the first time.
To access the Managed WAF user interface:
- Log in to the Alert Logic console and click the menu icon (
 ) to see the navigation menu.
 - Click Configure and then click WAF.

- Click Appliances.

- From the list of WAF appliances, click the name of the desired WAF to configure.
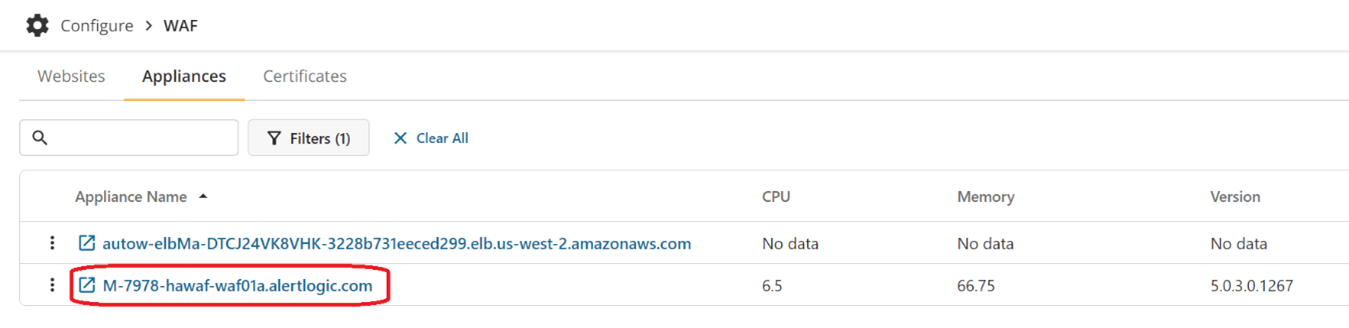
In the above example, there are 2 different WAFs: one autoscaling and one high availability (HA) Master WAF.
For an AWS Autoscaling WAF, the WAF name is the DNS name of the AWS Master WAF load balancer. In the above example, “autow-elbMa-DTCJ24VK8VHK-3228b731eeced299.elb.us-west-2.amazonaws.com” is an AWS Autoscaling WAF.
For a high availability (HA) WAF pair, there are typically two WAF appliances: one Master WAF and one Worker WAF. The name of the Master WAF starts with “M-“. In the above example, the Master WAF is named, “M-7978-hawaf-waf01a.alertlogic.com”.
The name of the Worker WAF starts with “w-“. In the above example, the Worker WAF is named, “w-7978-hawaf-waf01b.alertlogic.com”. By default, the Worker WAF is filtered out from the list. Click on “X Clear All” to show the Worker WAF on the list.
In an HA WAF, the configuration of the Master WAF is automatically copied to the Worker WAF. For HA WAFs, always make configuration changes to the Master WAF. In the example above, you should make all changes to “M-7978-hawaf-waf01a.alertlogic.com”.